How to design 3 per page Create-n-Hang Doorhangers (TM) using Publisher & Word
MICROSOFT(R) PUBLISHER
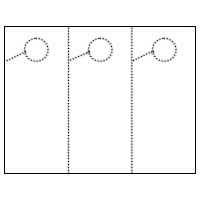
How to create a one-sided 3 per page Create-N-Hang DoorHanger (TM) sheet using Microsoft ® Publisher
1. Visit this link to download a Burris Computer Forms template, for versions
2000/2003 or 2007.
2. Insert graphic (by clicking Insert, Clip Art or Picture) or text, as desired in
the panel.
3. Adjust the position, as desired. Go to File, then Print Preview to view before printing. Verify that the document will print the same image three times on the sheet properly. (Note: Most printers will impose at least a 0.25 inch margin around the edge of the doorhanger.)
4. Print the document.
How to create a two-sided 3 per page Create-N-Hang DoorHanger (TM) sheet using Microsoft ® Publisher
1. Visit this link to download a Burris Computer Forms template, for versions
2000/2003 or 2007.
2. Insert graphic (by clicking Insert, Clip Art or Picture) or text, as desired in
the panel.
3. Adjust the position, as desired. To create the second side, go to Insert, then Page... . Ensure that "after current page" and "Insert blank pages" are selected. Go to File, then Print Preview to view before printing. Verify that the document will print the same image three times on the sheet properly. (Note: Most printers will impose at least a 0.25 inch margin around the edge of the doorhanger.)
4. Print the document.
MICROSOFT(R) WORD
How to create a one-sided 3 per page Create-N-Hang DoorHanger (TM) sheet using Microsoft ® Word
1. Visit this link to download a Burris Computer Forms template, for versions
2000/2003 or 2007.
2. Insert graphic (by clicking Insert, Clip Art or Picture) or text, as desired in
the first panel.
3. Tab, to move to the next panel. Insert graphic (by clicking Insert, Clip Art
or Picture) or text, as desired. Repeat for the last panel.
4. Print the document.
(TIP: How to get the blue guide lines to show on a template…
Word 2007-
On the Layout tab, in the Axes group, click Gridlines.
Word 2003-
Display or hide table gridlines in a document
On the Table menu, click Show Gridlines or Hide Gridlines.)
How to create a two-sided 3 per page Create-N-Hang DoorHanger (TM) sheet using Microsoft ® Word
1. Visit this link to download a Burris Computer Forms template, for versions
2000/2003 or 2007.
2. Insert graphic (by clicking Insert, Clip Art or Picture) or text, as desired in
the first panel.
3. Tab, to move to the next panel. Insert graphic (by clicking Insert, Clip Art
or Picture) or text, as desired.
4. Move cursor to the end of the last panel. Press “Tab” twice, to create an
additional page (for a second page of content).
5. Click in the panel and insert address. (Click here for mail merge
instructions.)
6. Print the document, using the duplex setting on your printer, if available. If
not, print the first side, then feed the second blank side in the appropriate
direction.
(TIP: How to get the blue guide lines to show on a template…
Word 2007-
On the Layout tab, in the Axes group, click Gridlines.
Word 2003-
Display or hide table gridlines in a document
On the Table menu, click Show Gridlines or Hide Gridlines.)