How To Mail Merge Four Postcards Onto One Sheet
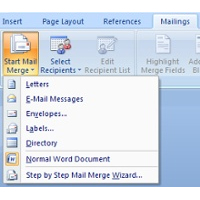
by Chelsea Camper | Last Updated July 19, 2019It is generally easier to do a Mail Merge in Microsoft Publisher® than trying to use Microsoft Word® to mail merge. Microsoft Publisher® was created to, well, Publish. It is also created with the purpose of printing one thing to multiple times on the same sheet of paper.
For this post we’re going to be printing addresses onto postcards. We’ll be using the Four-of-a-Kind template, but these steps will work for any kind of mail merge. With the Four-of-a-Kind template, we’re already set up to print four postcards onto one sheet!
If you’ve been with the blog for a while you may recognize some of these names from the Dr. Edward Awesomesauce Appointment Reminder Card How To.
Click on each image below to enlarge it in a new tab or window.
Step 1: Download The Four-of-a-Kind Postcard Template
First we’ll need to download the Four-of-a-Kind Blank Postcard Template. Use the green Download button on the right of the page to start the download.
Step 2: Open Template In Microsoft Publisher®
Open the template in Microsoft Publisher® (some may have opened automatically).
Step 3: Start The Mail Merge
Before starting the Mail Merge, in this step you would also create your postcard design. In order to keep the focus on Mail Merging for this post, we’re going to skip the whole design step and move right on to creating the Mail Merge.
In the Main Menu at the top of the window, go to: Tools > Mailings and Catalogs > Mail Merge
A Mail Merge wizard will appear on the left side of your window (unless you have moved your wizard window to another place). This wizard will help guide you through your Mail Merge. The first step is to choose whether you have a list to merge already or if you want to make a new one (or if you want to use your Outlook contacts).
For this example we already have a list to merge. Here’s what out example list looks like in Excel:
Pretty simple, huh? After selecting a list option, click the “Next” option at the bottom of the wizard. Now your wizard should be displaying the field names you have available from your list. Notice that the field names are the same as each cell in the first row of our spread sheet.
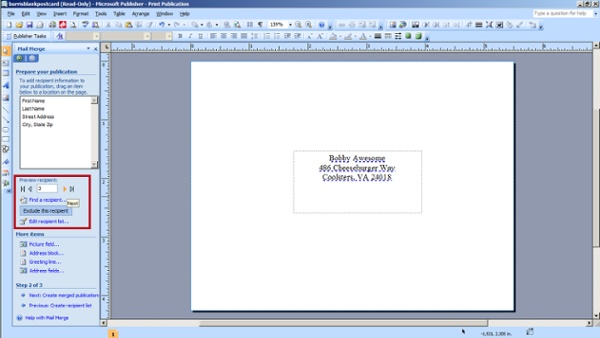
By simply double clicking on one of the field names, Microsoft Publisher® creates a text box for you and inserts the field name into it. Continue to add field names to this text box by double clicking on each. You can add spaces and punctuation between and around the field names.
To preview what the fields will look like, simply click outside of the text box and the first recipient will be displayed. You can view other recipients by using the navigation in the highlighted area of the image below.
Step 4: Print The Mail Merge
Once you’re satisfied with the field placements, you can either export the document out into a new document or print from the current one. For this example we’re just going to print from the current document.
Either select “Print…” from the top of the wizard or select File > Print (or ctrl + P if you like keyboard shortcuts!). To have four postcards on a sheet make sure you select “Multiple Pages Per Sheet”.
Before you hit that Print button do a Print Preview to make sure you have all your settings right.
Once the Print Preview checks out, you can go ahead and start printing!
Looking for postcard paper with four postcards per sheet?
Not endorsed or affiliated with any of the following: Microsoft Publisher® and Microsoft Word® are registered trademarks of Microsoft.


