5 Silly Printing Mistakes that Even Print Your Own Masters Can Make
by Chelsea Camper | Last Updated December 30, 2015Everyone makes mistakes; no one is perfect. We’ve heard those two phrases over and over again. We know that you can’t do everything right every time, yet we still get frustrated when small mistakes are made. Relax! Every now and then you have to take a deep breath and realize that you’re probably not the first person to make that mistake, which means the Internet usually holds the answer.
Let’s look at some common, silly mistakes that even a Print Your Own Master can make. We’ll talk about how the mistakes can be made and how to fix them.
Incorrectly Loading a Large Batch of Paper
Sometimes you’ll be printing on special paper (such as membership cards, trifold brochures, shipping label sheets, etc.) that requires you to load the paper in a certain way. Being a great Print Your Own Master, you’ve already tested how your printer prints the job on plain paper and have run a few small batches of test runs. Once you’ve figured it all out, you set your pile of paper to be printed in the exact orientation it needs to be loaded into the printer.
You have everything figured out, then, while you’re enjoying a sip of coffee, someone accidentally bumps into the pile of paper you have ready to go into the printer. They quickly straighten it, but turn it a different way. Enjoying your coffee, you don’t see this happen. When the printer runs out of paper, you head over to your paper pile to grab some more, not noticing they’ve been rotated.
The end result is that you have part of your print job run correctly while another part of it is completely backwards.
If it was trifolds you were printing, you can manually change the creases as you fold them to correct most of the problem sheets. However, for things like label sheets and membership cards, there’s little you can do except rerun the print job for those labels or members that got turned around.
Misspelling a Word in the Headline
Ah, spelling, it can be quite a tricky thing sometimes. It’s all too easy to switch an “e” and an “i” or place an “e” where an “a” should be. The whole spelling issue can be an even bigger trouble if you have an industry with a block of jargon that most spell checkers don’t have in their dictionaries.
A misspelled word can happen on the fly or even when you’re concentrating heavily on that one specific word. Sometimes the more you look at a word, the more you don’t think it looks like it’s spelled right, no matter what the spell checker says.
When you’re focusing that heavily on a word, you need to take a deep breath and lean back in your chair, then copy and paste the word into a Google search. Did Google try to correct it? Are there search results with your word spelled exactly like you have it? Does a dictionary with your word in it pop up as one of the first few results? If Google doesn’t try to correct your word, there are respectable and trustworthy sites spelling it the same way, and it comes up in a dictionary, most likely you spelled the word correctly.
While spell check and Google are great tools to have on hand, nothing can beat having another set or two of eyes look over your design before you start printing it.
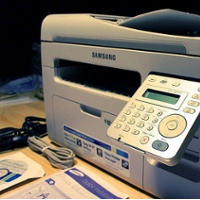
Printing to the Wrong Printer
Here’s the situation: You’ve got the printer you want to print on beside you in the office set up as your default printer. You send the print job, the printer just sits there. After waiting a minute or two, you send it again, thinking that there was a glitch or maybe you hit “Cancel” instead of “Okay.” Printer just sits there. Angry, you send it a third time. Again, the printer just sits there.
Hungry and irritated you decide to just head off to lunch and deal with the printer when you get back. As you reach for your coat you hear a commotion down the hallway and go to check it out. The hub printer at the end of the hall is spitting out printed paper like a mad man. Getting closer you realize that it’s halfway through printing your 3,000 entry membership card mail merge print job on plain paper and it has two more in queue.
Oops.
There are a couple of ways you can get the printer to stop. One way is to pull out the paper tray so that it stops itself until more paper is loaded, then go back to your computer and clear out the queue. Another way is to reset all three jobs.
When your printer doesn’t respond to a print job, the first thing you’ll want to check is that you’re sending the job to the right printer.
Pushing an Ink Cartridge or Toner Bottle Too Far
Toner and (especially) ink can be quite expensive. It only makes sense to push the cartridges as far as they will go, waiting until there’s not enough ink to even print a cyan circle. Although, when you’re running a large print job, this can cause a lot of problems.
Let’s say you have a large run of postcards to print for a direct mail campaign. Loading up the paper you notice that the Magenta ink says low, so you try a small run of 10 first. All ten look perfectly fine. Starting to test your limits, you send a run of 50. All of those come out just right. Deciding you don’t have enough time to babysit the printer all day, you go ahead and send half of your job to the printer without changing the Magenta ink.
When you return you find that the first 25 of your large batch came out alright, and the rest of it is clearly stripped of Magenta. Those that are stripped of Magenta clearly are no longer usable; you’ll have to reprint them.
Pushing an ink cartridge or toner bottle to its limits is a good way to save a little extra money, but when you’re doing large print jobs you need to be careful. You can always place the cartridge that’s low on ink in a ziplock bag then use a full cartridge for your print job. Once your print job is done, switch out the cartridges so that the low one is back in the printer. When you’re printing smaller jobs you can keep a closer eye on the ink levels and stop the printer when you see it printing without a certain color.
Accidentally Canceling Print Job in the Middle of a Mail Merge
So its getting close to the New Year and you’re printing out new membership cards for all 4,500 of your members. You have sent the job to your printer who is quickly printing the mail merged document.
Around entry 2,350 your printer runs out of paper for the seventh time. As usual, you grab a stack of membership cards, load them into the paper tray, then press “Okay” to resume printing. …But you didn’t press “Okay” this time, you pressed “Cancel Job.” Happily, the printer resets itself and stops printing.
There’s no way you’re going to reprint the first half of the print job. So how do you fix it?
Fortunately, Microsoft Word and Publisher both have a way to print only a specific set of entries. First you’ll need to find which entry was printed last. Find the last piece of paper that was printed, then do a “ctrl + F” in your Excel spreadsheet to find that particular entry. If the entry row is 2,356, it might actually be 2,355 in Word and Publisher if you have your columns labeled in the first row.
Write down the row from Excel on a scrap piece of paper then check in the preview that it’s the right entry or if you need to subtract 1 from the row number (for this example we’ll say that the last entry printed was 2,356, but we need to go down to 2,355 to find it in Publisher since our first row consisted of headers for the columns).
In Publisher, you would simply go to print (or hit ctrl+P) then select the “Entries” option under Page Range. Since that entry 2,355 has already been printed, we’ll need to start printing on the next entry, so we’ll add 1. In the field beside the “Entries” option, we’ll put 2,356-4,500. This will tell the printer to only print entries 2,356 to 4,500 (our last entry).
And there you are, back to printing like nothing ever happened!
What have you made any other mistakes while printing your own? Let us know in the comments below!
Don’t forget to check out our Getting Started Guide to help set you on the right path for printing your own!

Image: Sean MacEntee