How To Correctly Print On Folding Paper.
by Chelsea Camper | Last Updated July 19, 2019If you’ve ever printed a card, brochure, or other folding paper media you know that sometimes it can be hard to get your printer to understand what needs to be printed where. While templates can help a lot with that, you’re still faced with the problem of how your printer is built to print certain things.
For some printers, if you feed the paper with side A up and side B down, the printer will print on side B; others will print on side A. There are even some printers that will print on side A in one tray and side B on another tray.
Before you start printing on that nice, pretty paper you just purchased, you should go through some steps to make sure everything will turn out well. Here’s a cool little trick to make sure paper is loaded correctly.
*Click on each image below to enlarge it in a new tab or window.

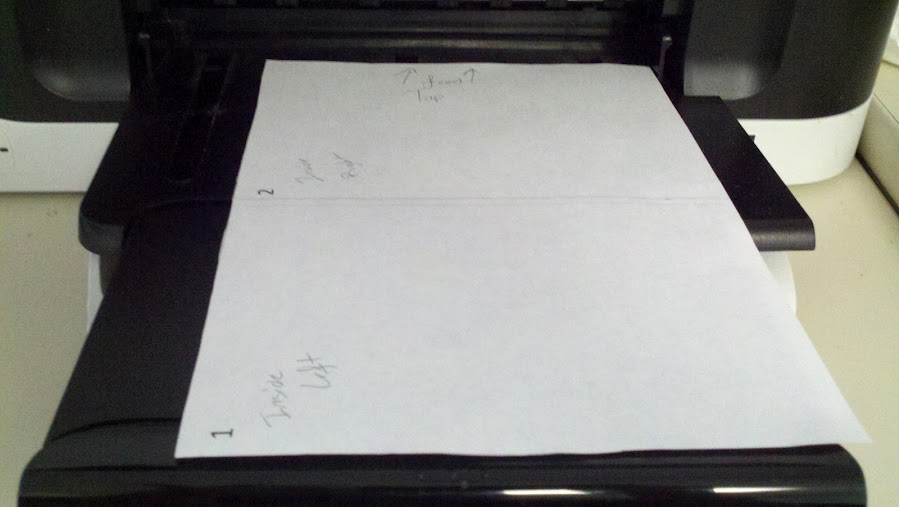
Step 1: Use plain sheet of paper as a mock up.
Grab a piece of plain copy paper and cut it to be about the same size as whatever you’ll be printing on. If you’re printing on a 5×7″ greeting card, cut the piece of paper down to about that size. It doesn’t need to be exact, just close enough to make sure your printer is set up to print on the custom size as well as make sure it’ll feed right.
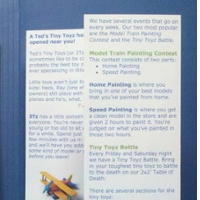
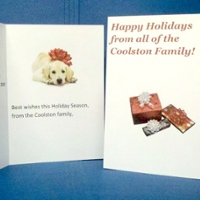
Also, keep in mind that a 5×7″ greeting card is 10×7″ when it’s flat!
Step 2: Mark the mock up.
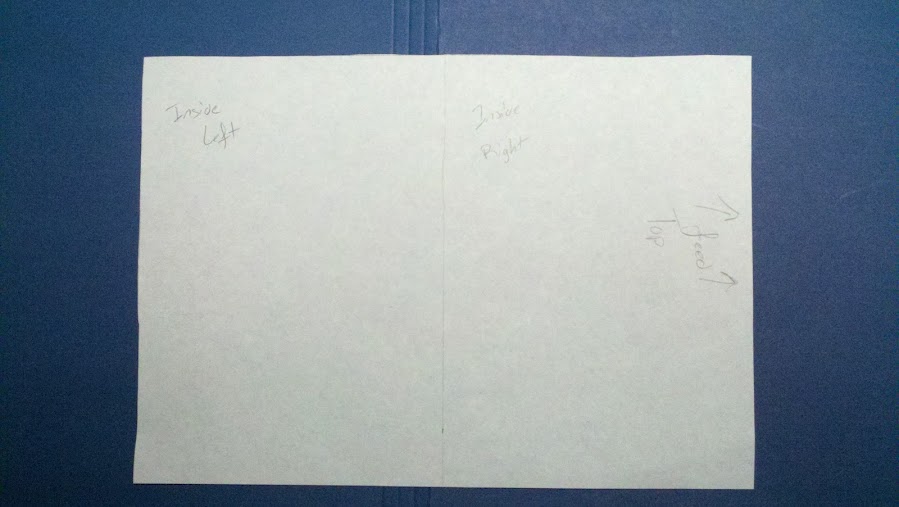
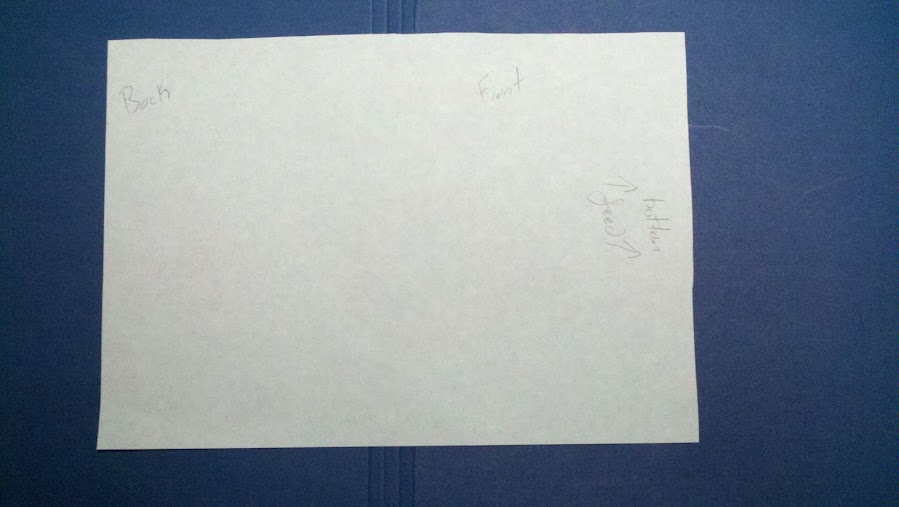
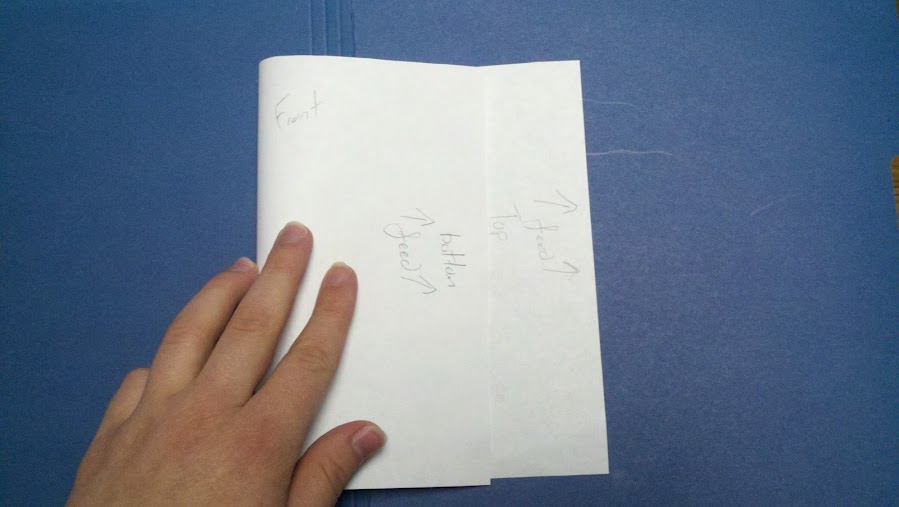
Now it’s time to write on the sheet of plain copy paper to show where everything should be. Keep in mind that when you fold your card/brochure, you should always fold toward the “hump” in the paper where the crease is.
Below in our picture example, we’re going to use the line in the middle (it’s only on one side) to represent our “hump,” so we will be folding toward our middle line.
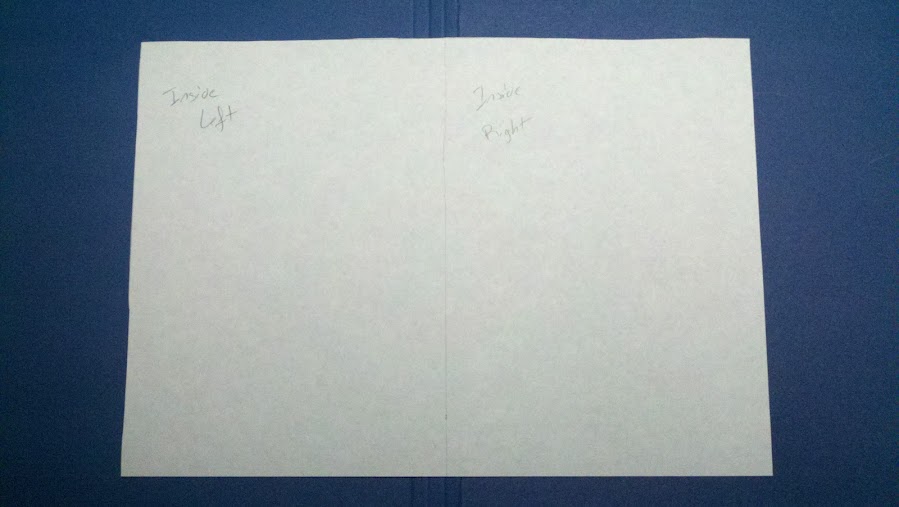
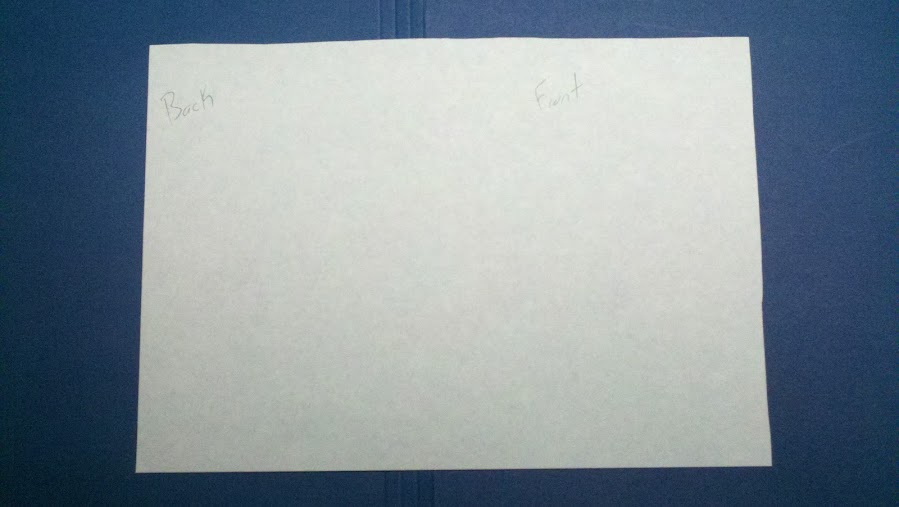
Here’s a few things you’ll want to mark:
- Which panel should be the front, back, inside left, and inside right
- Use arrows to show the direction you’re feeding the paper in to
- Note on the paper which side is facing up
Make sure your mock up will be folding correctly.
Step 3: Test print on the mock ups.
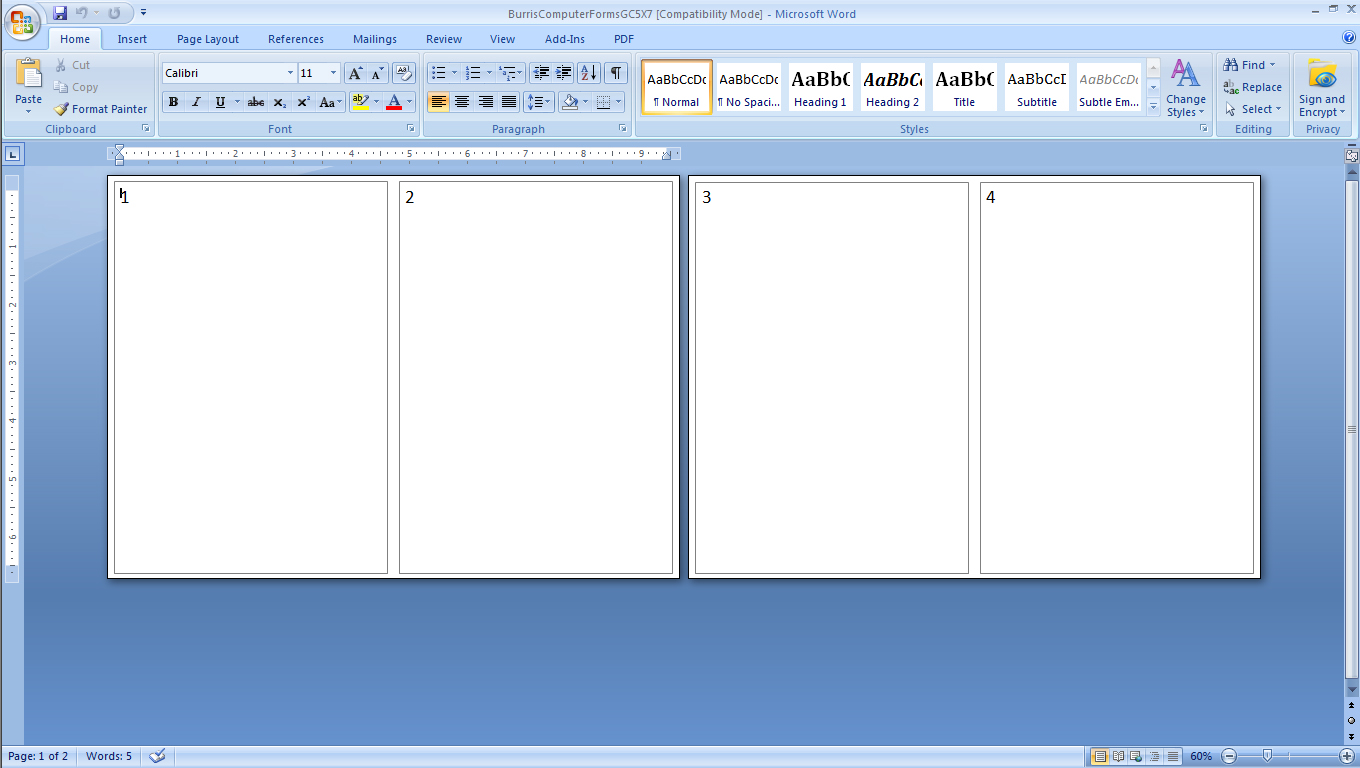
Set up your template to first print just numbers so that you can correspond where the numbers print out with what part of your design needs to go where. You can also use a text box outline to print the boundaries of your design and make sure those boundaries don’t fall on the fold of the card.
These are a few things to keep in mind when doing your test prints on your mock ups:
- Paper that folds needs to have certain things on certain sides
- Need to make sure orientation is right
- Make sure graphics are the right size
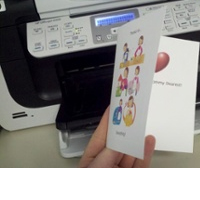
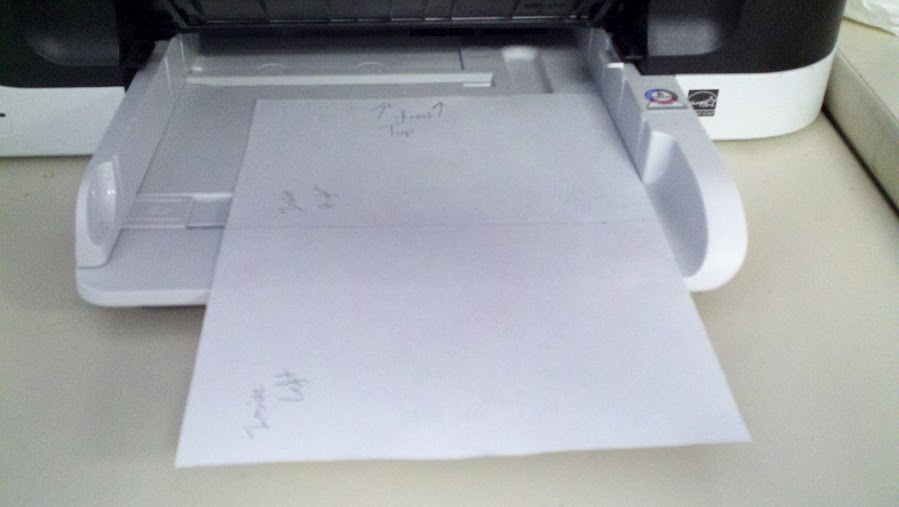
Now go ahead and start your mock up test printing. We’re going to first load the paper with our side labeled “Top” facing upwards and we’ll be feeding in the direction of the arrows.
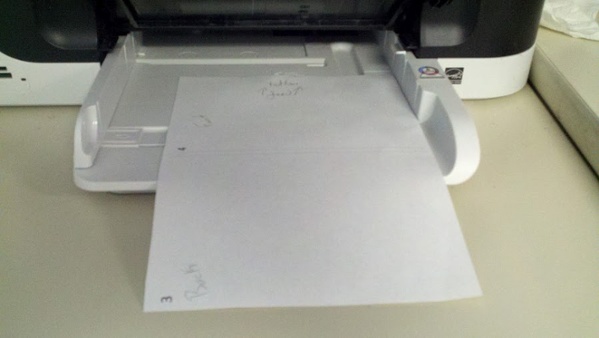
Since the printer printed on the “Bottom” of the paper, we’ll load it this time with the “Bottom” side facing up. Also, notice how the printer printed the second page first.
Now we get our final print out of the mock up paper.
*Repeat step 3 until you are satisfied with the mock up print and are comfortable with feeding the paper correctly.
Step 4: Test print on the actual card/brochure paper.
Now you can use the results from the mock ups to do one or two test prints on your actual paper. You don’t want to set the entire job to run until you know that your printer is properly set up to print on the special paper.
If the print is coming out splotchy or smeared you can slow the printer down by telling it that it’s printing on a thicker paper. Even if the paper is thin and glossy, setting your printer to print on “Thick” paper will slow it down enough that it will usually allow the ink to dry and prevent smearing.
Once the test prints come out looking right, you can confidently print the rest of your print job.
Do you print your own? If so, what do you print?
Whether you’re just starting out or are an experienced Print Your Own Master, this free Getting Started Guide can prove useful.