How To Print Your Own Tent Cards in Microsoft Word
by Chelsea Camper | Last Updated July 19, 2019Do you routinely hold business conferences? Does your business have large office lunches or meetings where everyone needs to know where to sit? Or are you a wedding planner who wants to find an affordable and flexible way of printing tent cards for each wedding?
Print your own tent cards!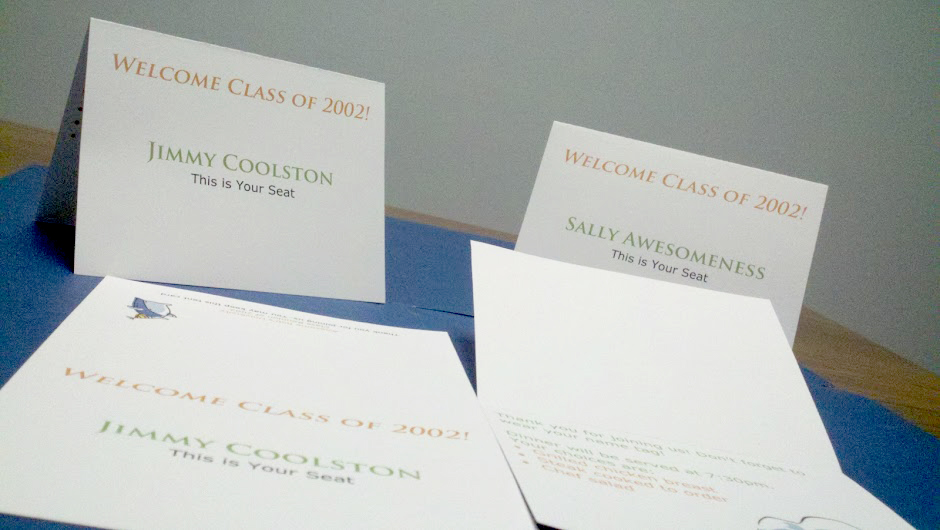
When you print your own you can customize the tent cards for each meeting, lunch, wedding, etc. You don’t have to pay for pre-printed tent cards or worry about whether they’ll get all of the names right or not. If it’s a smaller wedding or meeting you won’t have to worry about a minimum print job run. You can print as many or as few as you want for each event.
For this post we’re going to use Awesome Bob’s University as an example. They’re having an alumni reunion for the Class of 2002. We’ll look at the steps they can take to print their own tent cards for the reunion.
Step 1: Download the Tent Card Template
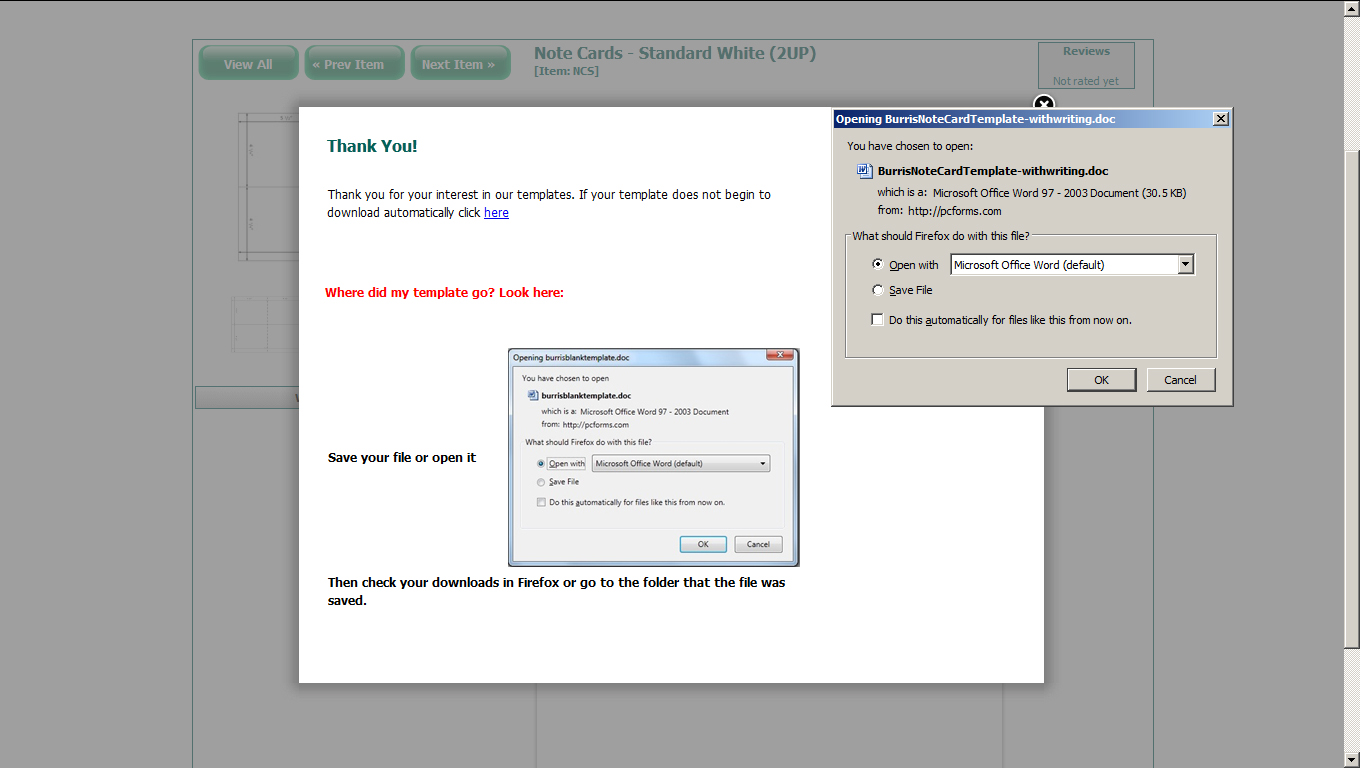
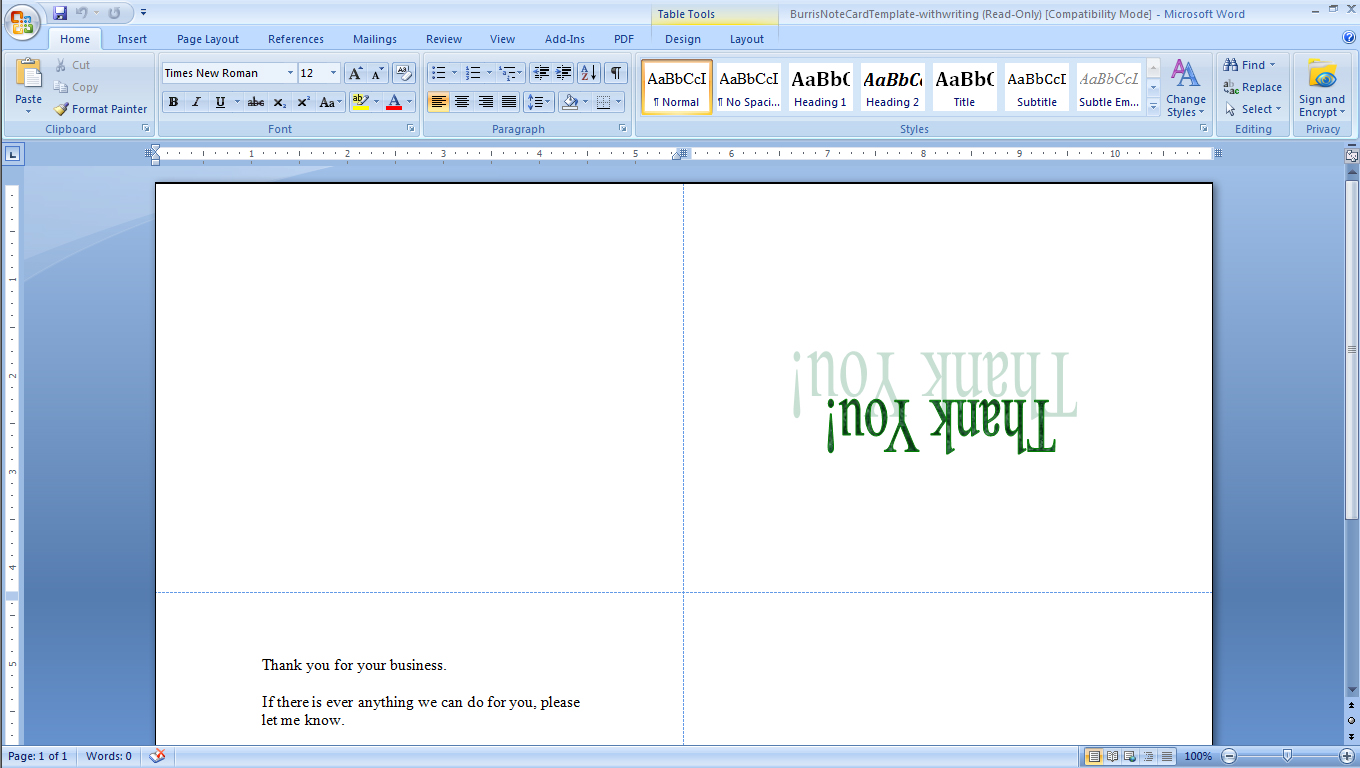
Download the Microsoft Word template for blank note cards.
Step 2: Open the Template in Microsoft Word
Open the template you just downloaded in Microsoft Word (some may have opened automatically). You’ll notice that the template already has text on it. The text is set up to be used for a note card since it is a note card template. If you’re planning to have text on the inside of the tent card, you’ll want to pay close attention to how the text is laid out.
In order to have text on the inside of the card, you’ll need to print on both sides of the piece of paper. To get an idea of how you’ll have to feed the paper to your printer, you can go ahead and use a scrap piece of paper to test how the default text will print.
We’re going to have text on the inside of our tent card for this example.
Step 3: Design Your Tent Cards
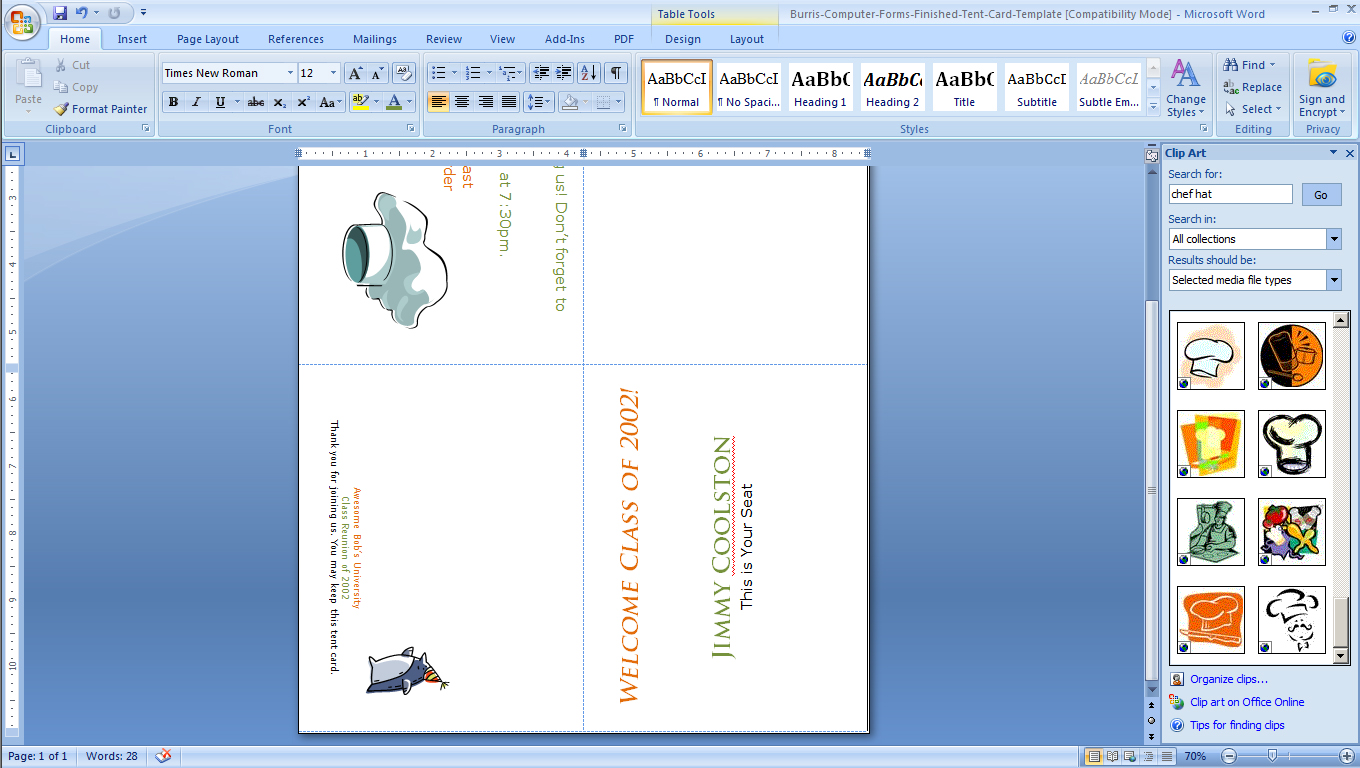
This is where you can have some fun! You can use your business’ logo, colors, etc. For this example we’ll be using Microsoft Clip Art, but you should use your company’s graphics or photographs.
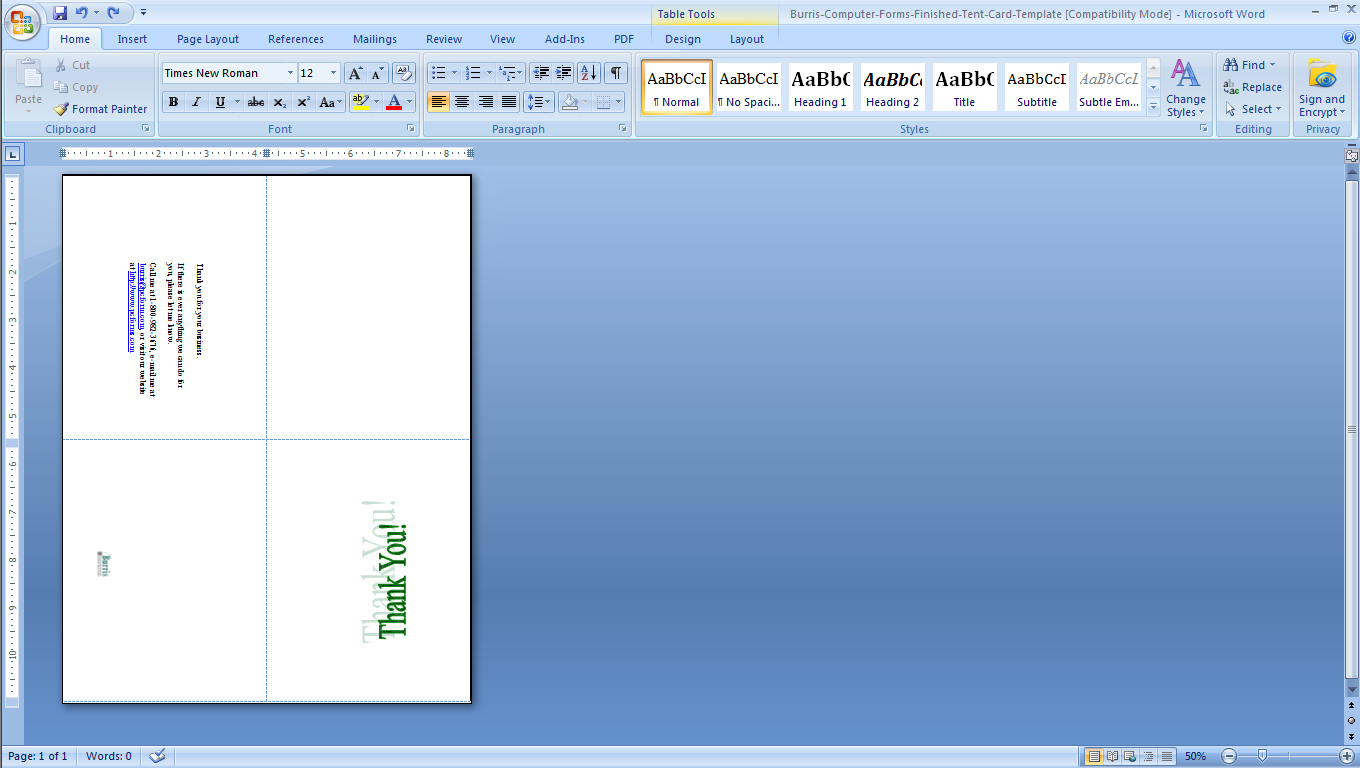
Don’t forget that there are two sides to the tent card. You can either have the person’s name on both sides or you can have their name on the side facing the chair and your company’s information on the back. The design is completely up to you!
You can introduce a mail merge to easily add all of the names you need without having to make a card for every single person. …Unless you want to make your tent cards highly customized and have a different note card for every person.
Notice how the text in the upper right (the Thank You) is upside down? The text in the upper right needs to be upside down in order to print out right. In order to have the text upside down, it needs to be in Word Art. You can’t mail merge to Word Art. If we flipped the panels around then the inside text would be on the back of the front panel.
So what are we to do?
Well, we know that you can turn the text to be sideways using Text Direction, so let’s just rotate the entire page! In the next paragraph I’ll explain how you can rotate the page, change the table ect., but the easy way to do it is to just download the finished template where it will be rotated for you already. (:
When you change the page layout from Landscape to Portrait it will obviously mess up the table. You’ll have to reset the table dimensions by highlighting all four cells and changing the height to 5.49″ and the width to 4.25″. Then right click on the table and select Table Properties. Click “Options…” and set all of the cell margins to 0″, uncheck Allow Spacing Between Cells (if checked), uncheck Automatically resize to fit contents (if checked). If you’re having trouble with half of your table being on the second page, highlight the default space that’s right under the table. Change the text size to 1. Change the line height to 0.06″.
This is what your new template will look like once you’ve moved the text around to the appropriate panels:
Now you can easily make your design without having to worry about using Word Art to turn your text upside down!
Step 4: Print Your Tent Cards
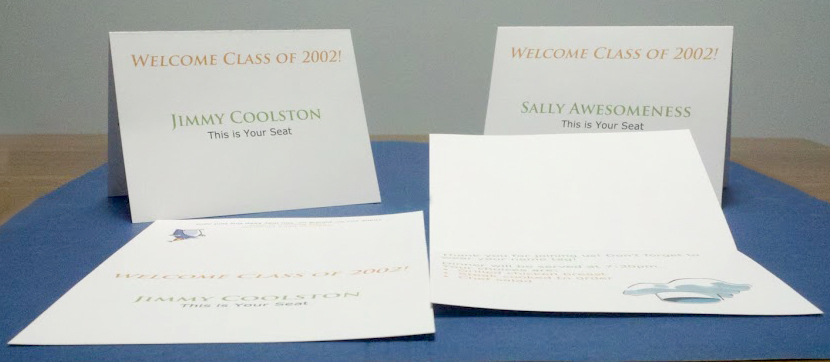
Now it’s time to print your tent cards! You should do a few test prints on regular paper to make sure your layout is correct. Hold the printed sheet of paper up against the note card paper to check that everything lines up.
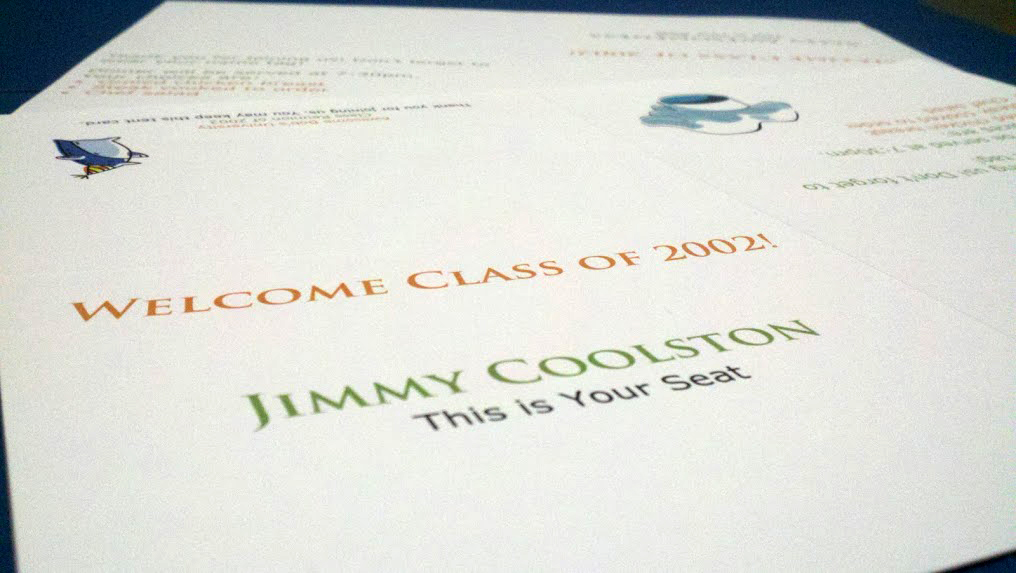
Here’s how ours turned out. How did yours turn out?

Want the finished template that was created in this tutorial?
You can download it here!
Most importantly, make sure to check out our tent card paper!
All paper isn’t created and perforated equally! If you enjoy the templates wait till you see our products (:

Not affiliated or endorsed by: MICROSOFT WORD is a registered trademark of MICROSOFT, INC.