How to Print Your Own Valet Parking Tags
by Chelsea Camper | Last Updated November 14, 2017Hospitals, country clubs, hotels, and many other businesses use valet parking tags. These help their guests get in and out without having to worry about parking. Some businesses offer valeting as a complementary service, while others offer the service day in and day out. When thinking about how many vehicles go through these types of businesses on a daily basis, one may realize how high the expense of buying pre-printed valet tickets might cost.
On average, the cost about $0.11 or $0.12 per valet parking permit when bought pre-printed. When you buy blank, printable valet parking tickets and print your own tags, you’ll only be paying about $0.08 per valet parking tag after printing.
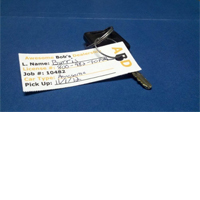
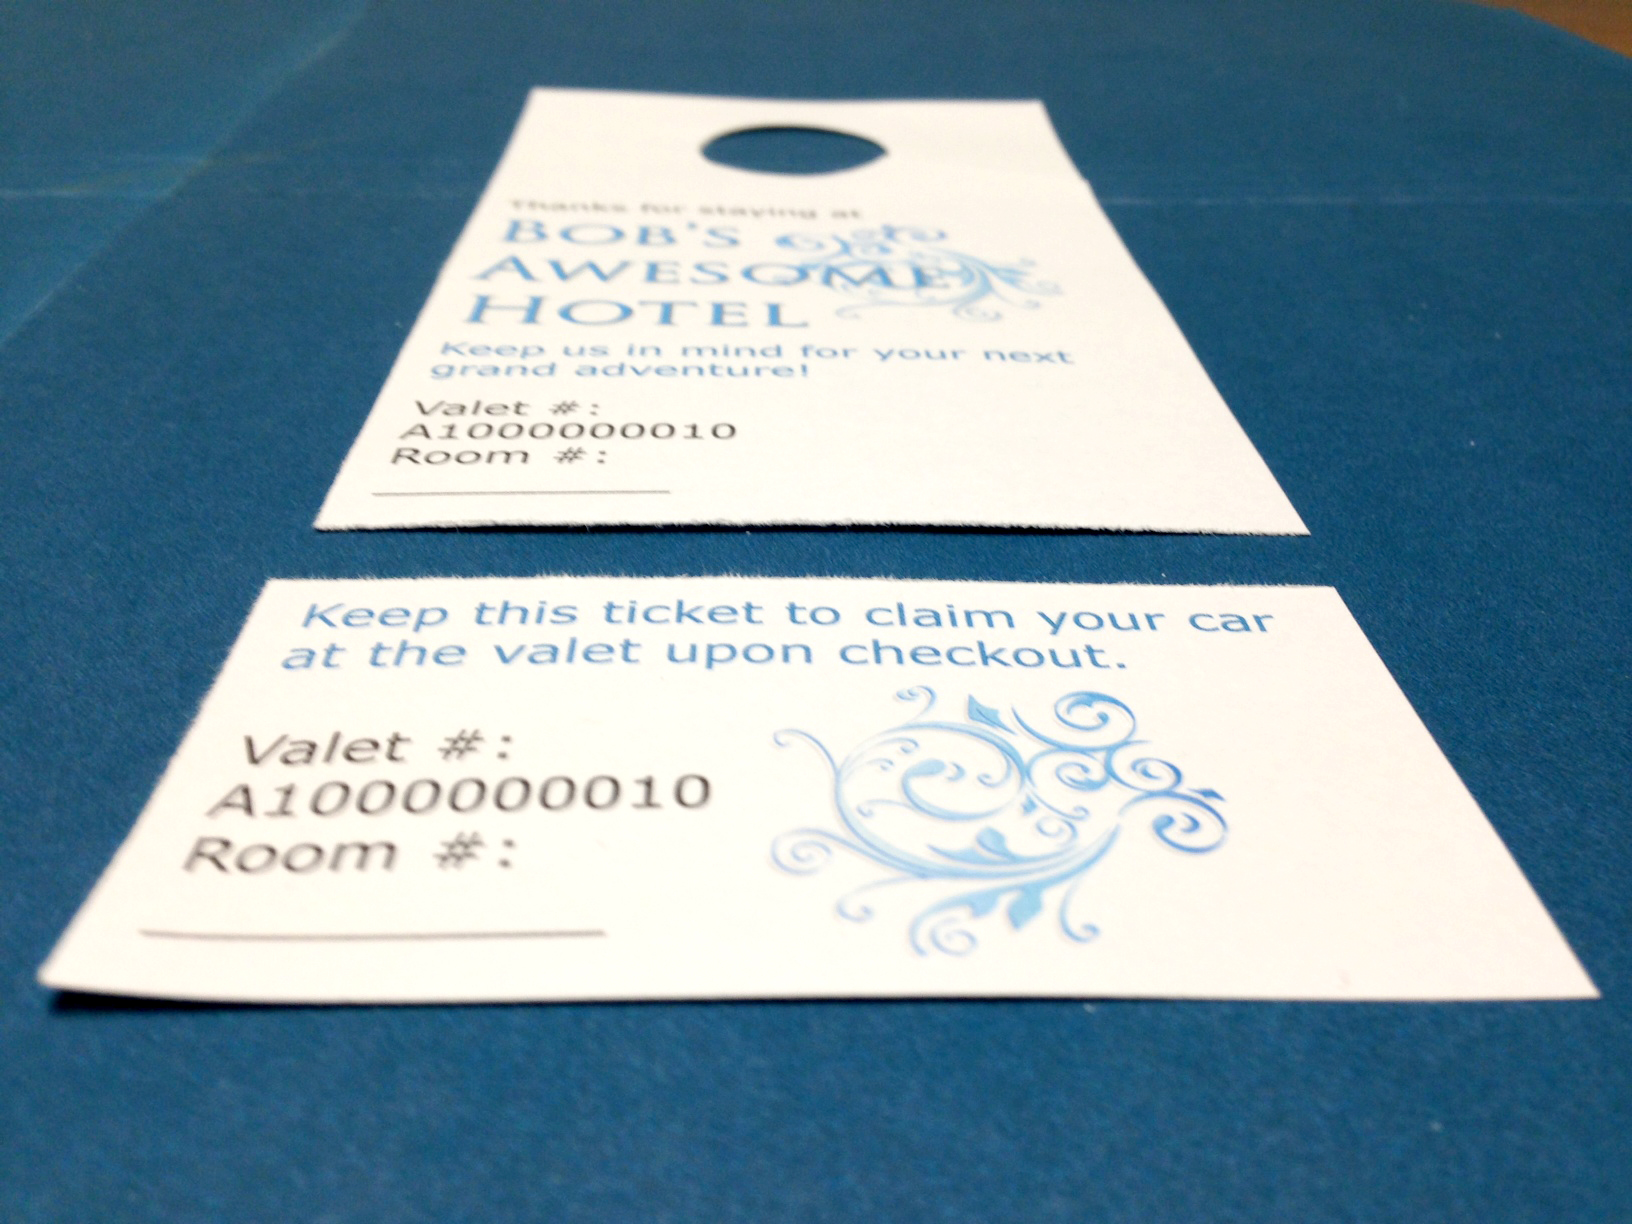
In this example we’ll be using the fictitious business Bob’s Awesome Hotel. They offer complimentary valet parking for guests staying for a full week or more. Valet parking for all other guests is offered for $10/night.
Let’s see how Bob’s Awesome Hotel can print their own valet hang tags to save some money.
Step 1: Download the Door Hanger Template
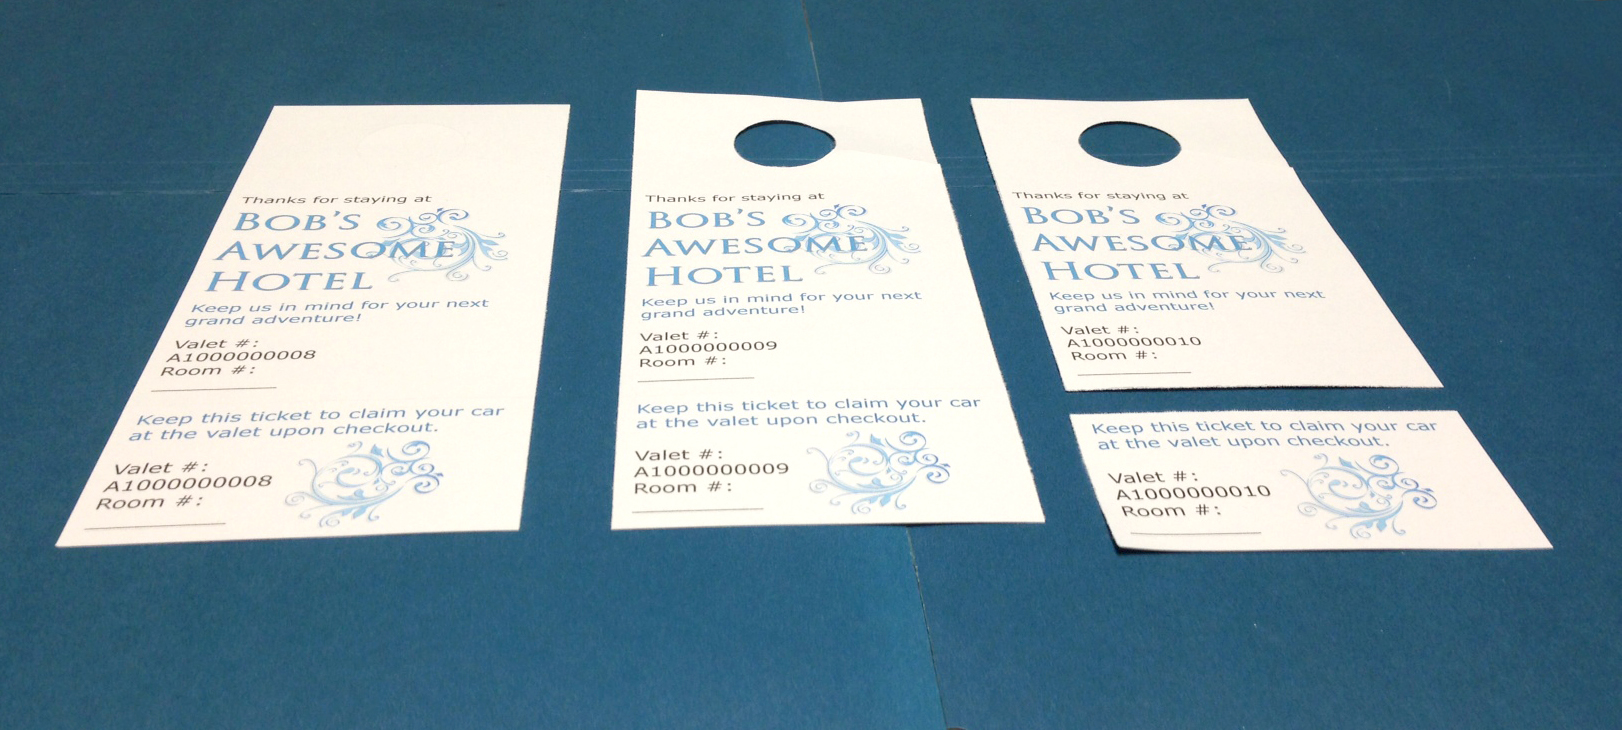
Download the door hanger template from the product page of your choosing. We’ll use the Door Hanger with Detachable Card for this example since the stub on the bottom of the door hanger can be removed and given to the hotel guest as a valet claim ticket.
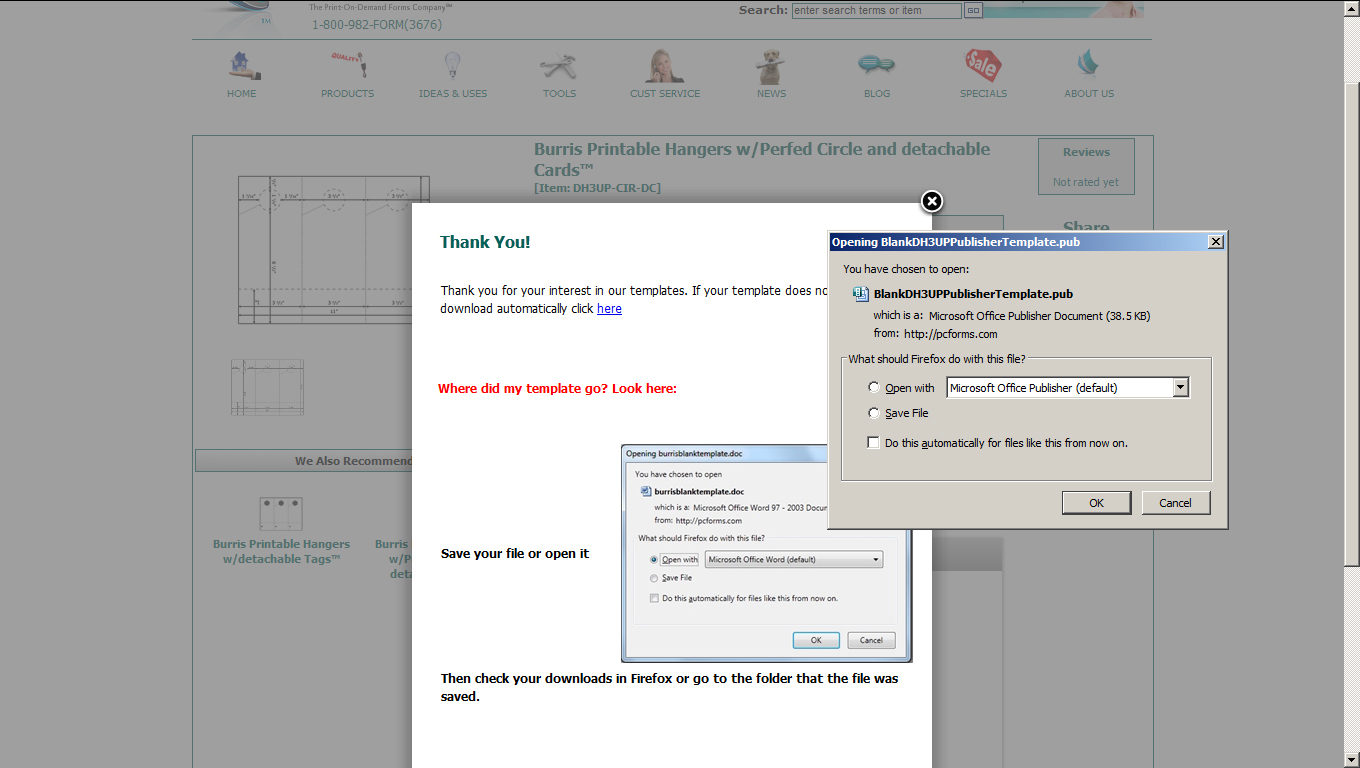
Step 2: Open the Door Hanger Template in Microsoft Publisher
Open the door hanger template in Microsoft Publisher (some may have opened automatically).

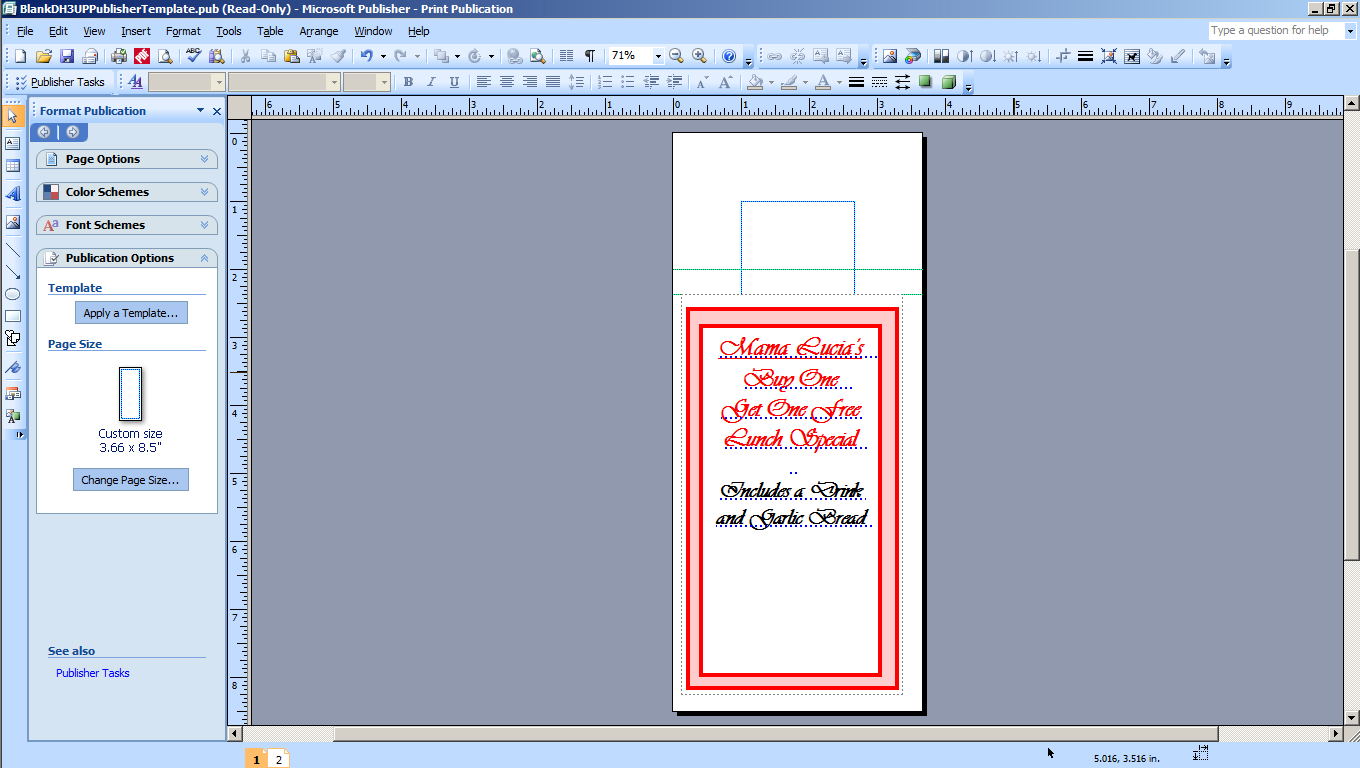
Step 3: Design Your Valet Hang Tags
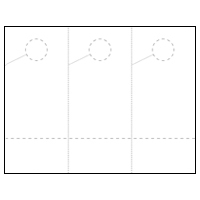
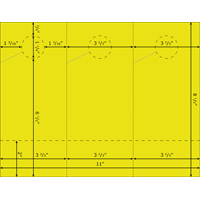
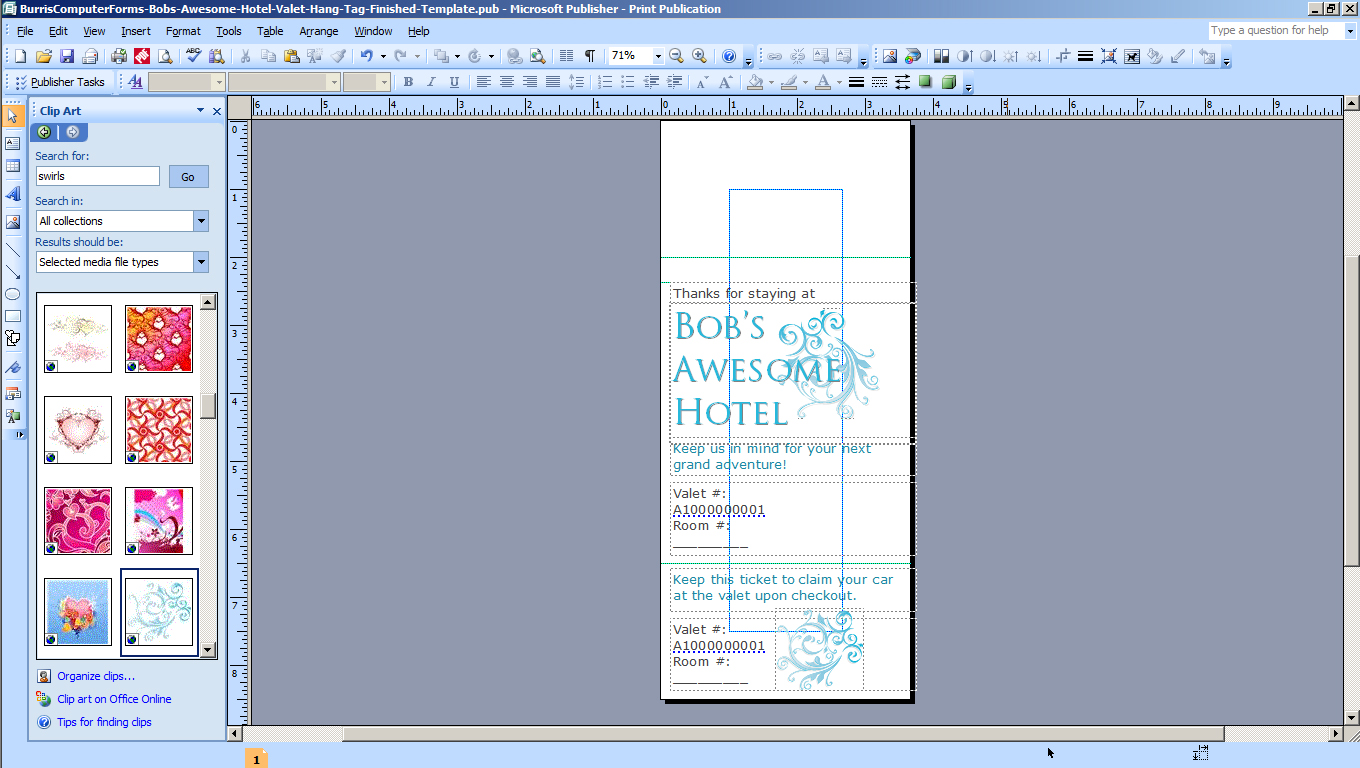
The first thing you’ll want to do is get rid of the default text. It’s there to show you where you should start your text so that the circle to hang the tag doesn’t interfere with the design. Drag a guide line down from the ruler to the top of the default text box before deleting the default text so you know where to keep your design below.
While the bottom of the circle is two inches from the top, the slit on the side of the door hanger drops down a bit further than that. Keep those positions in mind when creating your design. Below we’ve added a guideline at 2″ (for the bottom of the circle) and a guideline at the top of the default text box.
We’ll be using a similar numbering process from the LPN Bar Code Labels tutorial, except we won’t be putting the numbers in a bar code font. This will be for the valet number.
This example does not have anything printed on the back of the valet ticket template, so we’re going to delete the second page. For those that would like a back, use the second page to design the back of your valet tag.
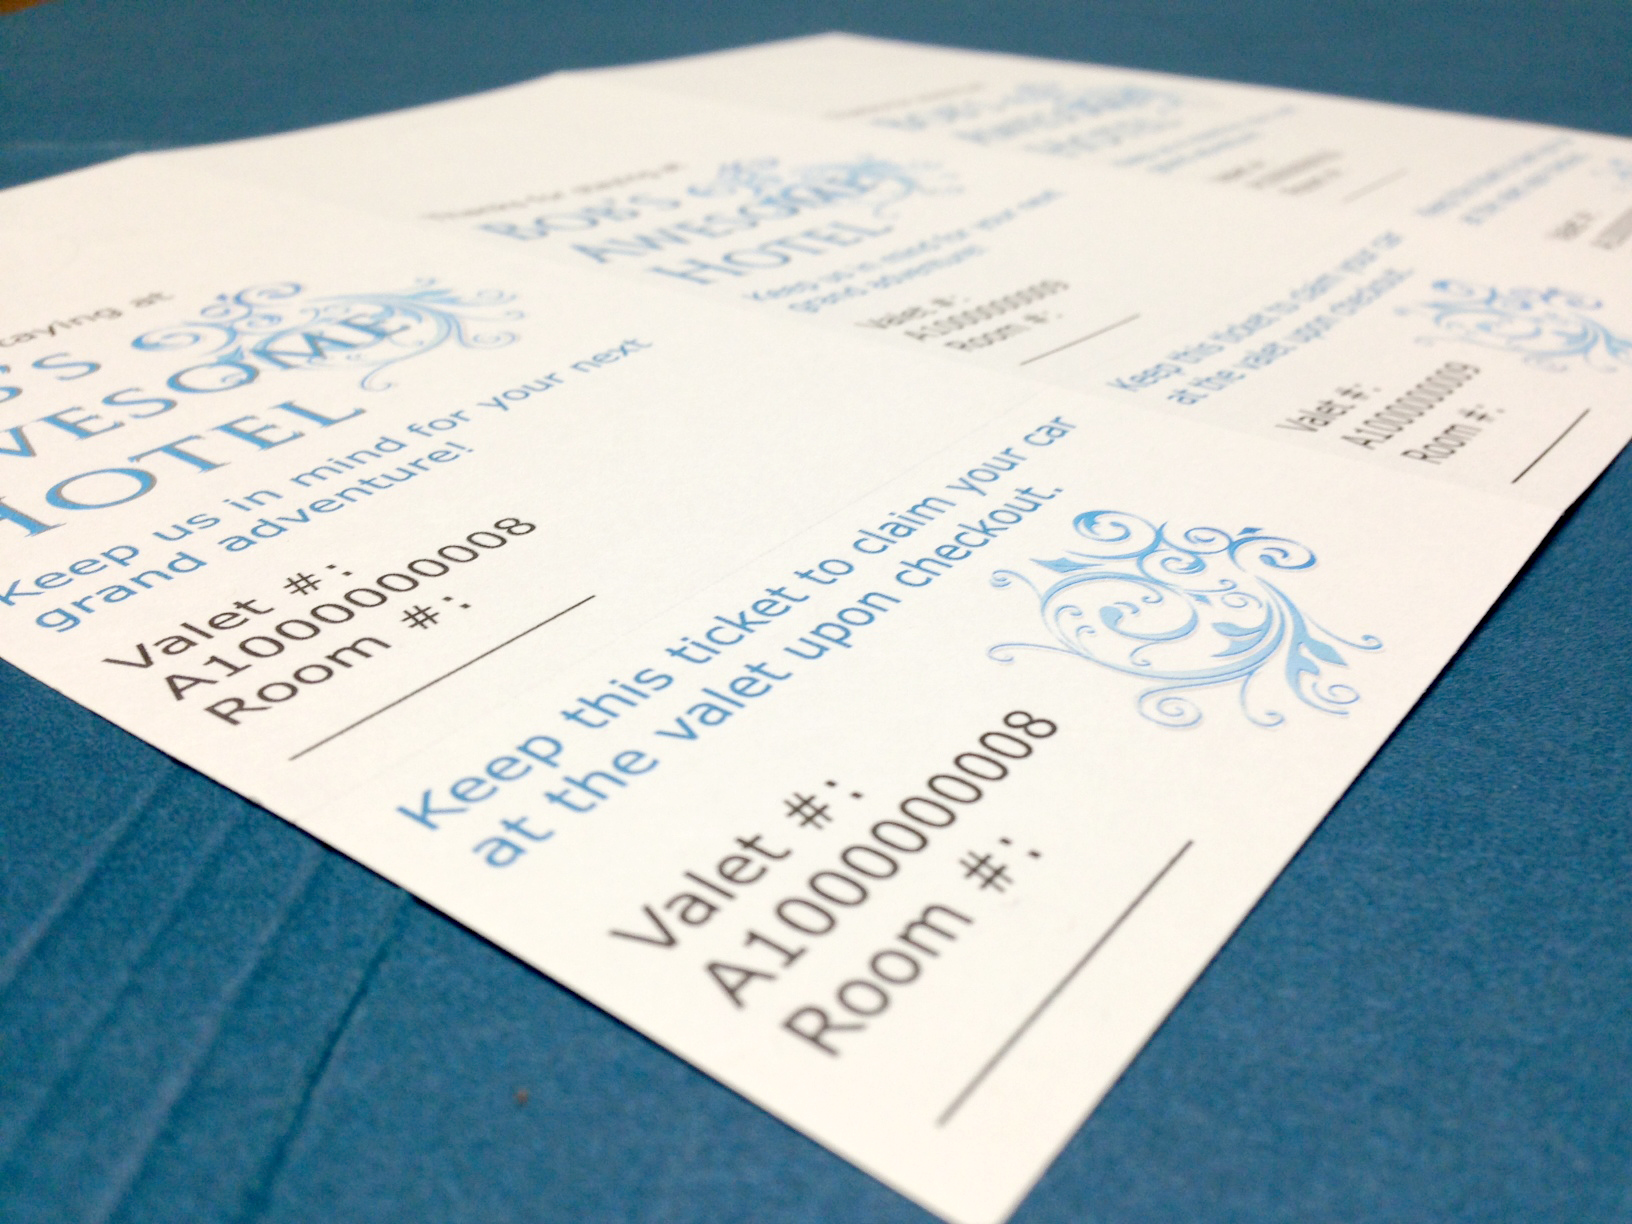
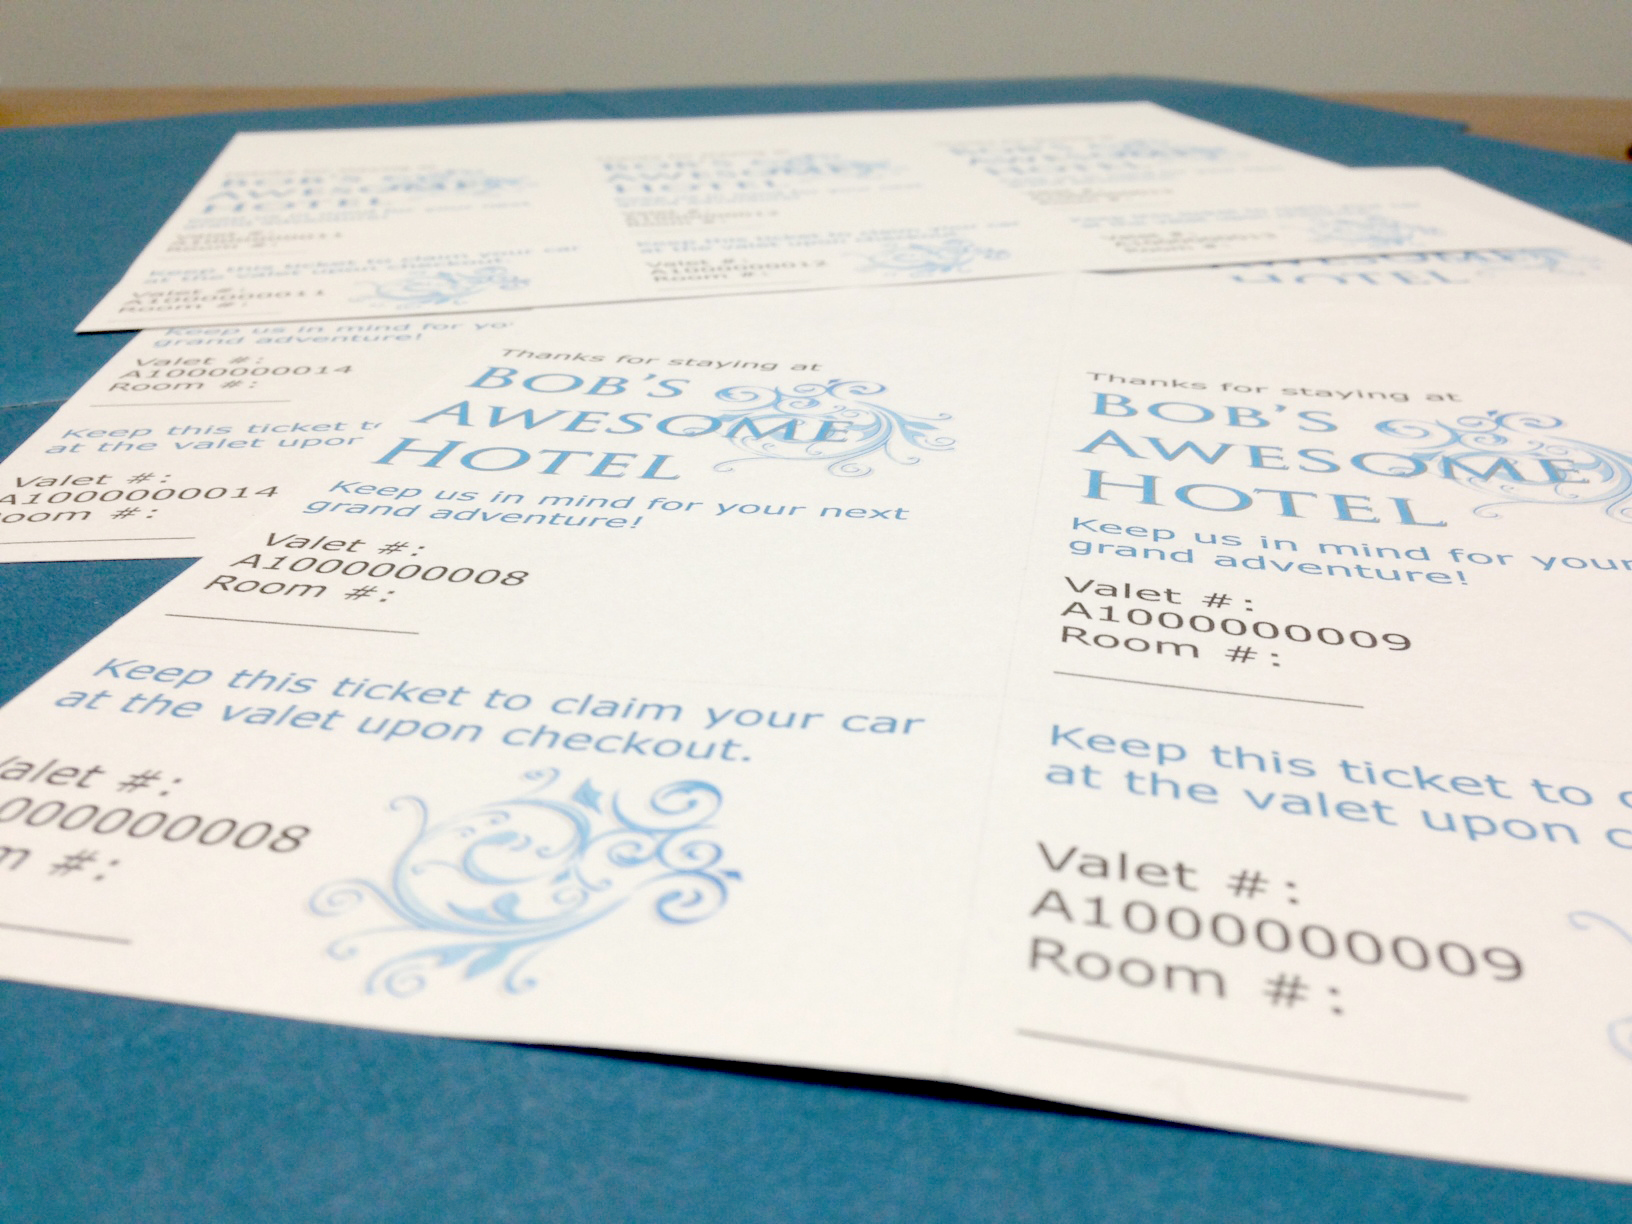
Step 4: Print Your Valet Hang Tags
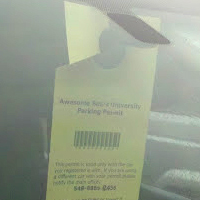
Now it’s time to print your valet parking tags! How did yours turn out? Here’s how ours turned out:
Want to learn more about printing your own? Check out our free Getting Started Guide!

Not affiliated or endorsed by: MICROSOFT PUBLISHER is a registered trademark of MICROSOFT, INC.